On the Users screen you will see a search box; this will auto-complete as you type in either the name, extension or department of a user. Click Add User to add to the domain

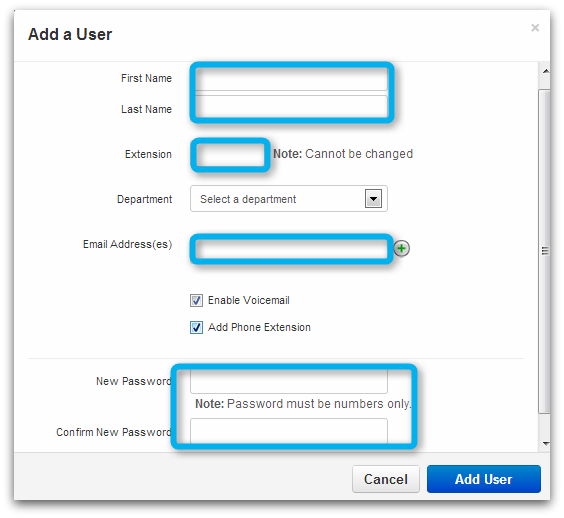
Creating a New User
When adding a new user enter their first and last name. Create an extension keeping in mind that it has to be numeric unless otherwise configured. In the Email Address(es) field, enter email address(es) that voice mail notifications should be sent to. If a physical device is to be provisioned to this user then check the box Add Phone Extension. When entering a password make sure that it is numeric so the user can access their settings on the phone keypad.
You may add a user to a Department as well. Currently, a Department is automatically created when you add a value to the box. This Department will be available as an option to all future added users.
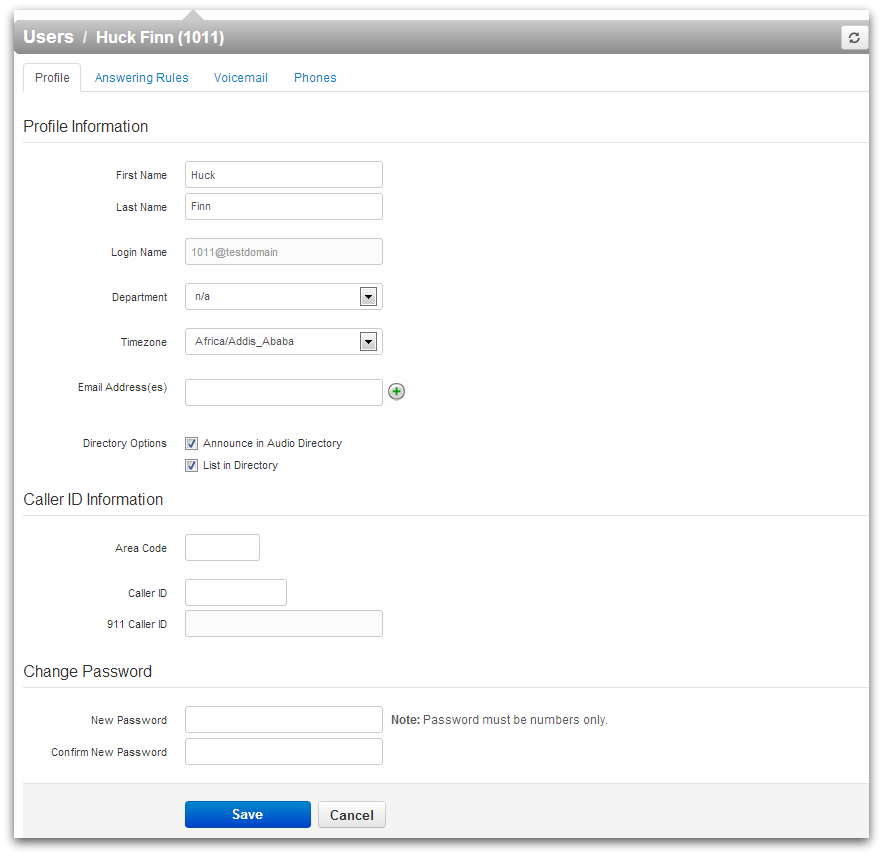
Editing User Profile
From this tab, Profile information can be added or modified. Directory options determine whether the user will be announced in the dial by name directory or whether the user should be listed in the Contacts section of the basic user portal. Caller ID can be set to any number; typically the companies main number. The area code is used by the system when processing a local seven-digit call. Emergency Caller ID helps to define the location where emergency services will be sent in case of an emergency. These are passed whether an emergency call is being made or not. Change Password can be reset if the user has forgotten a password. There is no way of telling what the current password is.
Answering Rules
Answering Rules combined with time frames tell the system what do with an incoming call. The default behavior is to ring the user’s extension.
Ring time out determines how long a call will ring before the answering rule takes over. To add a rule, click on Add Rule.

Time Frames determine specific hours of certain days or a span of days the answering rule will be active. For example: Monday-Thursday 5pm-8am, or July 7–July 25.It is a good idea to have one or more time frames ready before creating your answering rules. Give your time frame a name that matches the time frame and usage; e.g., weekends forward to cell. If you do not have a time frame created select default (all the time) until you create a desired time frame.

In the example shown above, we can assume the time frame (All the Time) is set to always and all of the user phones will ring, including the users extension. If the extension is not answered, the user’s cell phone (
858-555-1234) will ring after the time out set on the Answering Rules screen. Ring all user’s phones will ring all phones in a users inventory. If the user has only one phone, this may cause a problem. It would be better to add the cell number in the box next to sim-ring as a catch. The example above would most likely be used for a queue wherein the supervisor would want to receive a cell phone call if the queue wasn’t handled.
If Do not disturb is selected then all calls are routed to the user’s voice mail box. For Call Screening,the system will ask the caller to record their name and then a call is placed to the user. The user has a choice of answering the call or sending it to voice mail. For Call Forwarding there are a few different options:
- Always – if selected this is the ONLY rule that the system will process when the call comes to this user
- When busy – if the user’s device returns a busy signal then this option will be processed
- When unanswered – if the user does not answer the device then this option will be processed
- When offline – if the device ever becomes unregistered then this option will be processed
For Simultaneous Ring the system can ring all of the users phones, other users devices or off-net numbers. In order to add more simultaneous ring locations click on the green plus sign.
Once the answering rule has been created this is what will be shown on the Answering Rules page. The Active label shows the answering rule that is currently in effect.
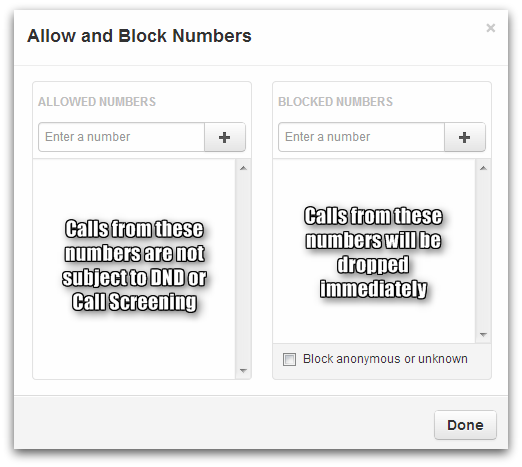
Upon clicking on the Allow/Block button the following box will pop up. Enter numbers you wish to Allow and Block
Voicemail Settings
From this tab various voicemail settings are configured. From here you can enable or disable voicemail at any time. There are various voicemail options with regards to how you hear the messages. There are a couple of ways to clear space in the voicemail inbox; either by deleting all voicemail messages or by clearing the data (voicemail messages, greetings, music on hold and recorded name) in the account altogether. The latter is useful for re-purposing a mailbox for a new user using the same user name.
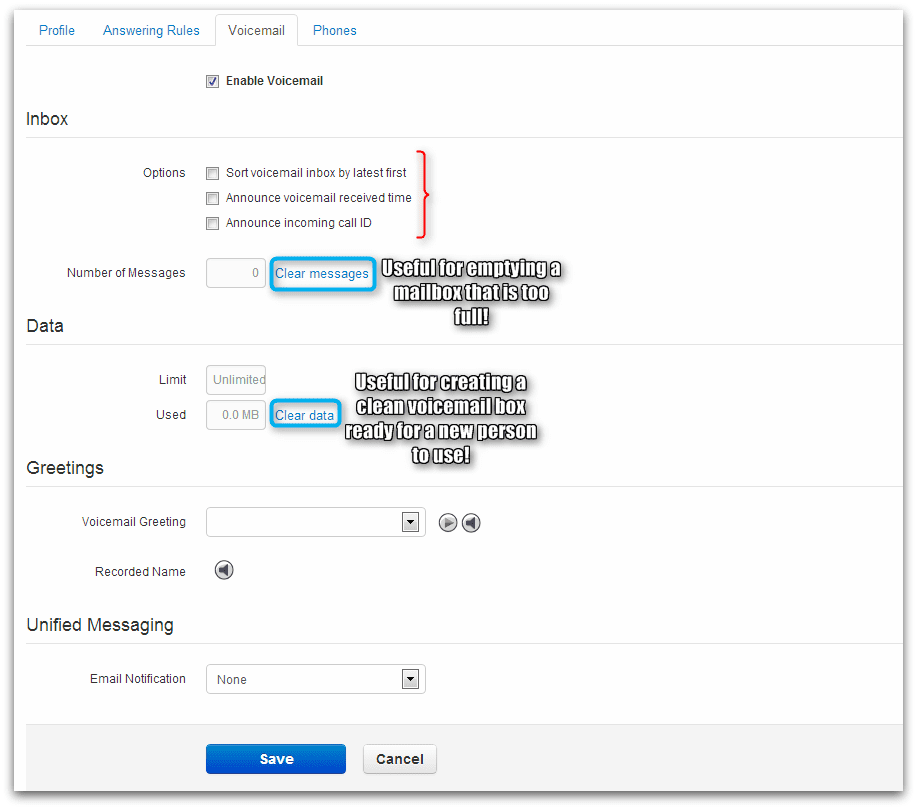
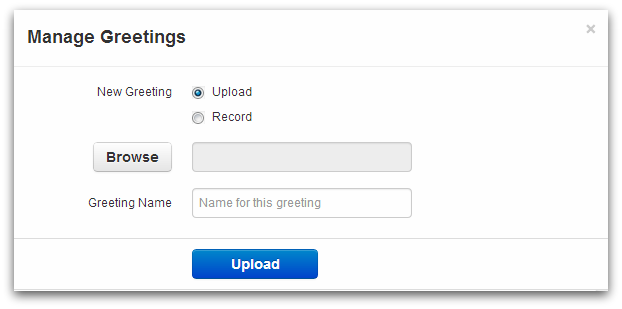
Manage Greetings
You can also manage greetings by selecting a new one, confirming that the current selection is correct (by pressing the play button to the right), uploading or recording new ones.
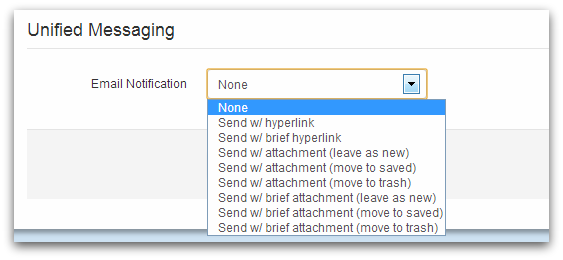
Unified Messaging determines the format in which email notifications from voicemail messages will be sent. Options that are sent with a hyperlink or brief hyperlink format reduce the size of the email message; i.e., The brief format has no branding information on it. There is also an option to keep the message as a new message or to move to saved or trash. For example: A user may want to organize phone messages in a separate desktop application while keeping the new messages file in the portal current.
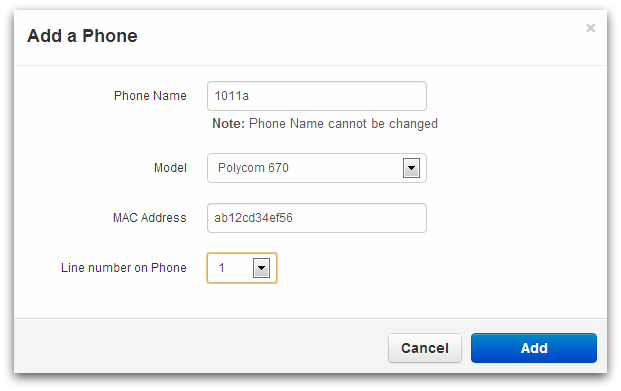
Adding/Editing/Viewing Phones
If a phone extension was created at time of user creation then this can be seen by looking at the Phones tab. Information on the device type, MAC address and line to be assigned can be entered by clicking on the device name hyperlink.

From this tab you can also add another phone or device such as an analog telephone adapter (ATA) or softphone.
The devices will be listed as such:
Click on the name to edit or display device attributes.